A push-to-open system lets a cabinet door open with a gentle press, without a visible handle. Cabinet Door Push To Open hardware is useful for sleek kitchens, bathrooms, and storage units where clean fronts matter. The mechanism usually combines a spring-loaded catch with a compatible hinge. Press the door, and the catch releases it; press again to close it. Simple in principle.
A reliable installation starts with checking the hardware against the door, cabinet, and hinge type. Measure the available space, read the manufacturer’s instructions, and gather a drill, screwdriver, pencil, and measuring tape. Small differences matter. A few millimeters can change how the door sits or whether the catch engages smoothly. Mark the mounting point carefully, then secure the mechanism and test the door before making final adjustments. Avoid overtightening screws, especially in particleboard, where the fixing can loosen or damage the surface.
This guide explains how to install the hardware, adjust its position, and troubleshoot common issues such as doors that pop open unevenly or fail to stay closed. Take your time. I have learned that a quick measurement can be tempting, but checking twice is often easier than filling misplaced screw holes. Cabinet designs vary, so follow the product instructions whenever they differ from general guidance. After installation, test each door several times and confirm that it opens and closes without rubbing, sticking, or shifting.
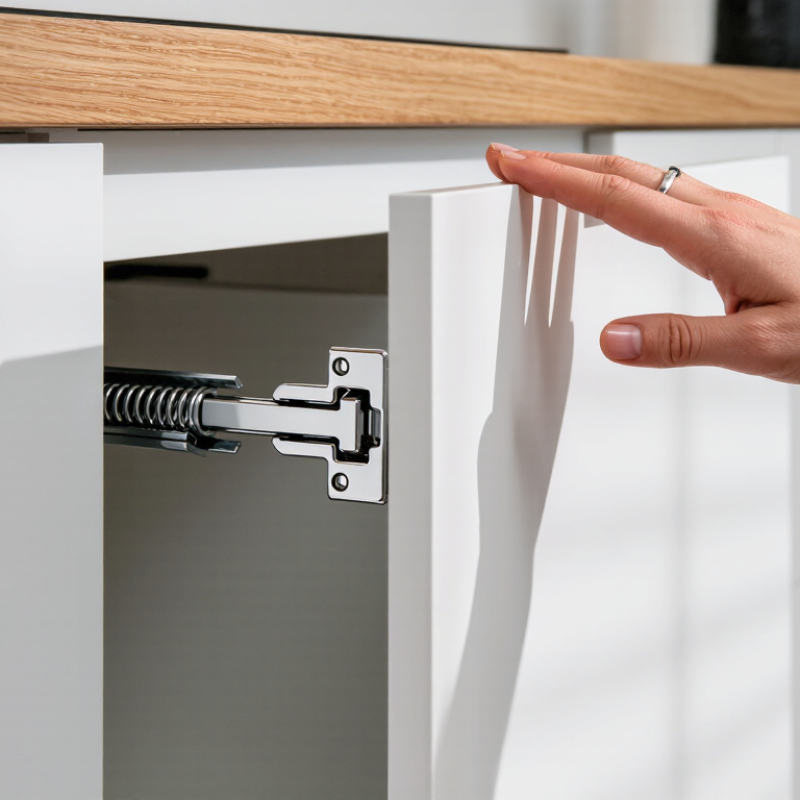
Tools and Materials Needed for Installing Push-to-Open Hardware
How to Install Cabinet Door Push to Open Hardware?
Tools and Materials Needed for Installing Push-to-Open Hardware
A careful setup makes cabinet door push-to-open hardware easier to position. Gather the latch, mounting plate, supplied screws, tape measure, pencil, screwdriver, drill, suitable drill bit, and a small level. A soft cloth protects the cabinet finish, while masking tape can help keep pencil marks visible. Check the hardware instructions before drilling; mounting details can vary between models.
Measure the door and cabinet opening, then mark the latch position lightly. Confirm that the door has enough clearance to open freely and that the latch suits its size and weight. Drill pilot holes only where the instructions allow, and keep the drill straight. A pencil mark can look centered but still be slightly off, so remeasure before fastening. Tighten screws snugly, not forcefully, to avoid damaging the cabinet or hardware.
Tips: Test the door before installing every screw. Adjust the latch if the door sits unevenly or needs too much pressure. Keep small parts together; they are easy to lose.
Prepare the Cabinet Door and Choose the Hardware Location
Remove the contents and clean the door’s inside face. Check whether it is frameless or face-frame construction, then confirm the push latch suits that setup. Measure the door overlay and nearby gaps; a few millimeters can affect how the door sits. Mark a likely latch point near the opening edge, where a gentle press can release the door. Do not drill yet.
Use the hardware maker’s template and keep the latch clear of hinges, shelves, and drawer fronts. For an accessibility-minded layout, the U.S. Access Board’s 2010 ADA Standards specify an unobstructed reach range of 15 to 48 inches above the floor. Treat this as a useful planning reference, not a universal cabinet-placement rule. The actual comfortable spot depends on the user, cabinet height, and door size.
I mark the position, close the door, and check the reveal from the front. Then I test the reach with the cabinet in normal use. Small detail. A latch set too close to the edge may twist a wide door; one set too far in can feel awkward. I still double-check before drilling. My first pencil mark is not always the right one.
How to Install Cabinet Door Push to Open Hardware? - Prepare the Cabinet Door and Choose the Hardware Location
| Step |
What to Check or Measure |
Preparation and Location Guidance |
Why It Matters |
| 1. Confirm the door type |
Check whether the door is overlay, inset, or partially inset, and note which side carries the hinges. |
Open and close the door to identify the cabinet frame or side panel that the push hardware can contact when the door is shut. |
Door style and hinge position affect the available mounting surface and the contact point. |
| 2. Measure the door |
Record door height, width, thickness, and the gap around the closed door. Measure thickness at an accessible edge. |
Compare the measurements with the hardware instructions before drilling or choosing a mounting position. |
Hardware designs have different mounting and clearance requirements; there is no single door thickness or gap that suits every model. |
| 3. Inspect the mounting surfaces |
Check the inside face of the door and the cabinet surface for a flat, solid area free of hinges, shelves, wiring, and other fittings. |
Choose a position where the hardware can be secured firmly and its moving parts will not collide with nearby components. |
A clear, stable mounting area helps the mechanism operate smoothly and reduces the risk of interference. |
| 4. Choose the contact location |
Identify a contact point on the cabinet frame or side panel opposite the door’s opening edge. |
Position the plunger so it meets a firm area of the door when closed. Use the supplied template or the dimensions in the hardware instructions to set its exact location. |
Correct alignment lets the plunger press the door outward without striking an edge or obstructing closure. |
| 5. Check the planned position |
With the door closed, verify the planned contact point and the clearance between the door and cabinet. |
Mark the position lightly with a pencil. If possible, hold the hardware in place and test the door movement before making holes. |
A dry fit can reveal alignment or clearance issues before installation becomes permanent. |
| 6. Prepare for installation |
Gather a tape measure, pencil, suitable drill and bit if required, and the specified fasteners. |
Follow the hardware instructions for hole size, drilling depth, fasteners, and any required adjustment to the plunger. |
Using the specified installation details helps prevent damage and supports reliable operation. |
Note: Exact mounting positions and clearances vary by hardware design and cabinet construction. Follow the instructions supplied with the selected hardware.
Mark and Drill the Mounting Points
Before drilling, confirm which side of the cabinet will carry the push latch and which side will receive its strike plate. Hardware layouts vary, so use the supplied template or measure the actual parts instead of relying on a generic distance. Close the door gently and check where the latch can meet the plate without forcing the panel.
Mark the mounting points with a sharp pencil. Keep the latch square to the cabinet edge, and check that the door has enough clearance to sit flush when closed. A small combination square helps. Measure twice. If the cabinet has an overlay door, account for its overlap before setting the latch position. Even a careful mark can be slightly off, so test the layout with the door held in place.
Make small pilot holes at the marks, using a drill bit narrower than the screw shanks. Set a depth stop with masking tape to help prevent drilling through the cabinet wall. Keep the drill straight; angled holes can pull the hardware out of alignment. Stop and inspect. If a hole shifts or the wood starts to split, pause and reassess rather than forcing the screw. After drilling, brush away the dust and check that each mounting point still lines up with the hardware.
How to Install Cabinet Door Push to Open Hardware: Mark and Drill the Mounting Points
Reference conversions for marking drill depth. These are inch-to-millimeter conversions, not universal drilling recommendations; follow the hardware instructions and avoid drilling through the cabinet panel.
Install the Push-to-Open Mechanism and Magnetic Catch
Start with a clean, empty cabinet door and mark the mechanism position on the inside face. In the 2024 U.S. Houzz Kitchen Trends Study, 87% of renovating homeowners reported upgrading cabinets. That makes reliable door operation a practical detail, not just a finishing touch. Check the hardware instructions for the required setback; even a few millimeters can affect how far the door opens. Drill pilot holes, then fasten the push-to-open mechanism without overtightening. The plunger should meet the door squarely. Test it before installing the magnetic catch.
Close the door gently and mark where its inner surface meets the cabinet frame. Mount the catch at that point, keeping its magnet aligned with the strike plate. Press the door to check release, then adjust the catch or mechanism in small increments. A door that springs open unevenly may indicate misalignment, not a faulty part. I have found that rushing this adjustment often means doing it twice.
Tips: Use a pencil, a small level, and a short driver. Test with the cabinet loaded as it will be used; added weight can change the feel. If the door sits proud, pause and recheck the alignment before drilling new holes.
Adjust the Hardware and Test the Door Operation
After installing the push-to-open hardware, adjust its position so the door sits evenly against the cabinet frame. Check the gaps along both sides; a narrow, consistent reveal usually signals good alignment. Make one change. Use the adjustment screw or plunger setting specified in the hardware instructions, since designs differ.
Close the door gently, then press near the installed mechanism. The door should release with a smooth push and open far enough to grasp its edge. If it stays shut, adjust the plunger depth slightly. If it springs open too far or feels harsh, reduce the pressure. Small changes are easier to judge than a full turn. Then test again.
Open and close the door several times, using the same light pressure each time. Check that hinges do not pull the door out of line and that neighboring doors still open freely. A common mistake is adjusting the latch to compensate for a loose hinge; tighten or align the hinge first. I have found it tempting to keep turning the adjuster, but that can make the fit less predictable. Recheck the door after a few minutes, especially if the cabinet face is not perfectly flat.
Conclusion
Installing Cabinet Door Push To Open hardware is a straightforward way to create a clean, handle-free cabinet front. Begin by gathering the required tools and materials, then inspect the cabinet door and select a suitable position for the push mechanism and magnetic catch. Consider the door’s size, surrounding frame, and available space so the hardware can operate without obstruction.
Mark the mounting points carefully and drill the necessary holes, taking care to keep them aligned and at the correct depth. Secure the push-to-open mechanism and magnetic catch according to their placement, then adjust their positions as needed. Finally, test the door several times, checking that it opens with a gentle press and closes securely. Small adjustments can help achieve smooth, reliable operation.

 Xianghui